How To Slipstream SP3
|
If you have an older Windows XP CD, either the original XP CD without any service pack or a CD with Windows XP Service Pack 1 (SP1) or SP2 already integrated, you can use this procedure to create an installation CD with SP3 integrated into it. You will need to perform this procedure if:
The procedure described here is related to several Microsoft Knowledgebase articles, however the Microsoft articles do not cover the steps necessary to create a bootable CD; they only show you how to copy the contents of the Windows CD to your hard disk and integrate SP3 into the file structure on your hard disk. If you want to read the original Microsoft articles, you will find them here: You can use the instructions at the latter link to do an emergency slipstream on your hard disk if you do not have a CD burner. The articles are for SP2, however there is no difference in the process for SP3. |
|||
| Before you Start You will need to make sure that you have sufficient disk space to carry out the procedure. SP3 uses about 500MB when expanded, plus the 270MB+ for the unexpanded service pack itself, plus about 700MB for the Windows XP installation files from your XP CD. You should allow 2GB of free space to be safe. Whilst these instructions assume the procedure will be performed on drive C:, any drive that has sufficient free space can be substituted. A tool to manipulate ISO images is needed. These instructions assume IsoBuster, though you can use other commercial products such as WinISO, MagicISO, UltraISO, ISOedit, or any other ISO tool that can extract boot images. IsoBuster has a free component, which is suitable for the task ahead: Download IsoBuster and install it. If you do not have a copy of the complete Windows XP Service Pack 3, download but do not install it. The file is named WindowsXP-KB936929-SP3-x86-ENU.exe and is 270MB+ in size: Windows XP Service Pack 3 Network Installation Package for IT Professionals and Developers You will also need a software package to create and burn the CD. The instructions for burning the CD will depend on your burning software. Burning instructions are given for Nero 6.x and Roxio. If you have other burning software then you will have to rely on the notes provided at the end and add the detail yourself. This is because the options vary from version of burning software to the next and from one manufacturer to another. It is beyond the scope of this article to detail how to use your burning software. If you can't work out how to burn a bootable CD from these instructions, don't bother creating a bootable CD and follow these instructions instead: The instructions at the above link apply to bith SP2 and SP3. |
|||
|
|
|||
|
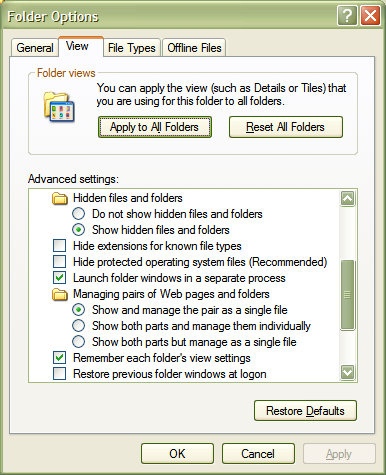
Set Folder Options Start Windows Explorer and select Folder Options from the Tools menu, then click the View tab. Make sure that "Show hidden files and folders" is selected and that "Hide protected operating system files (Recommended)" is unchecked:
When you have completed this procedure and made your new XP SP3 CD, you can optionally put the above two settings back to how you want them. If you don't take this step then you will not be able to copy all the necessary files from your XP CD. |
|||
|
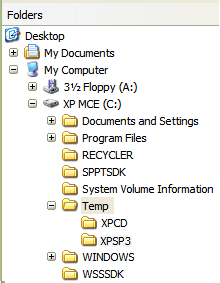
Create Directories Substitute your chosen drive letter for C: in the steps that follow. Where you create the directories or folders is up to you, but to keep them together it is suggested that you create C:\Temp (if you don't already have it). Inside C:\Temp, create two folders named XPCD and XPSP3:
Wherever you put the files, ensure that there are no spaces in the path that you create. |
|||
|
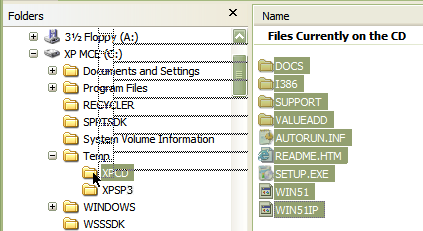
Copy XP CD Contents Copy the contents of the entire original Windows XP CD into C:\Temp\XPCD:
|
|||
|
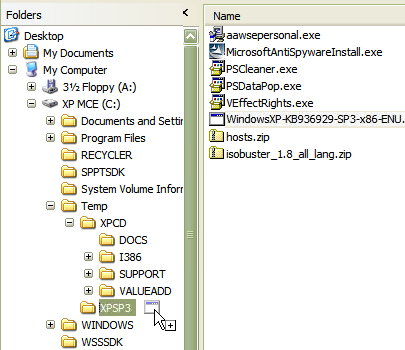
Copy and Expand Service Pack 3 Copy the file named WindowsXP-KB936929-SP3-x86-ENU.exe, from the folder that you downloaded it to, into C:\Temp\XPSP3:
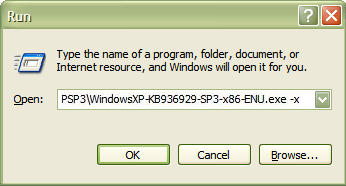
Enter the following command either in a Command Prompt or the Run... dialog on the Start menu: C:\Temp\XPSP3\WindowsXP-KB936929-SP3-x86-ENU.exe -x
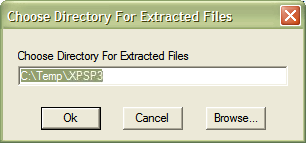
The Service Pack Installer will ask where it should extract the files to. Verify that the extraction path is pointing to C:\Temp\XPSP3 then click Ok:
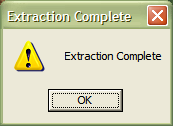
Click OK when the extraction is complete. |
|||
|
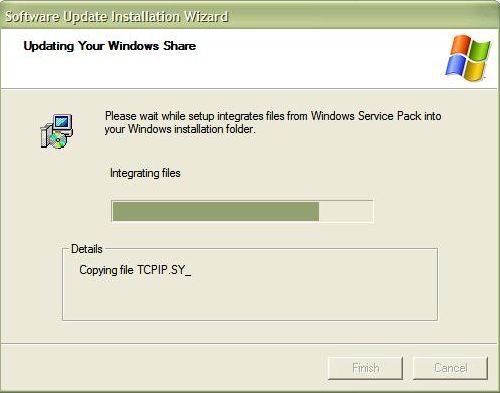
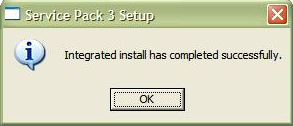
Integrate Service Pack 3 Enter the following command either in a Command Prompt or the Run... dialog on the Start menu: C:\Temp\XPSP3\i386\Update\Update.exe -S:C:\Temp\XPCD
|
|||
|
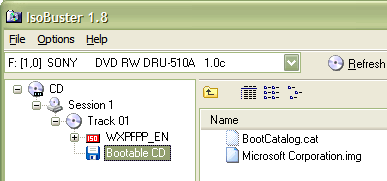
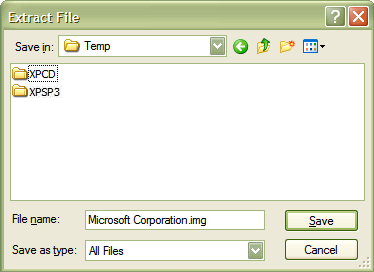
Extract Boot Image from XP CD With the original Windows XP CD inserted in your CD-ROM, start IsoBuster. In the left panel, click on Bootable CD:
If you have an English version of Windows XP, the volume label will probably be one of the following:
|
|||
| Burning with Nero 6.x Create a new compilation of type CD-ROM (Boot): Do not click New yet. On the Boot tab, click Image file and browse to the bootable image: C:\Temp\Microsoft Corporation.img You may have to select All files *.* when browsing for the .img file. Enable expert settings. Kind of emulation: No Emulation Load segment of sectors (Hex): 07C0 Number of loaded sectors: 4 On the ISO tab: Data mode: Mode 1 File system: ISO9660 + Joliet File name length (ISO): Max of 31 chars (Level 2) Under Relax restrictions, check all options on. On the Label tab: Click Manual. For both ISO and Joliet, enter the label you wrote down when performing the steps at Extract Boot Image from XP CD, WXPFPP_EN for example. Click More Labels. In the ISO 9660 column, enter: Publisher: MICROSOFT_CORPORATION Data preparer: MICROSOFT_CORPORATION In the Joliet column, enter: Publisher: Microsoft Corporation Data preparer: Microsoft Corporation On the Dates tab: Uncheck Set volume creation and modification. Uncheck Set volume effective and expiration. Check Use the date and time from the original file. On the Burn tab: Finalise CD (no further writing possible) must be checked. This checkbox may be disabled but checked, or it may be enabled and checked, depending on the default setting for Write method, which should be set to Disk-at-Once. Click New and copy all the files and directories in C:\Temp\XPCD to the ISO compilation panel. |
|||
| Create a New Project of type Bootable Disc: Bootable Disc Type: No Emulation Load Segment: 0x7c0 Sector Count: 4 Browse to the bootable image: C:\Temp\Microsoft Corporation.img Project Properties (General tab): Volume Label: Enter the label you wrote down when performing the steps at Extract Boot Image from XP CD, WXPFPP_EN for example. File System: ISO 9660 Disc Format: Mode 1 CDROM Project Properties (Advanced tab): Publisher Name: MICROSOFT CORPORATION Prepared By: MICROSOFT CORPORATION Copyright: MICROSOFT CORPORATION File Date: Use original file date File Names: Any MS-DOS 8.3 character file names Project Properties (File Filter tab): Add Files: click All files Uncheck Do not add Hidden files Uncheck Do not add System files Close Project Properties : When you click OK to close Project Properties, you should be prompted to change the name of Microsoft Corporation.img. The software suggests MICROSOFT.IMG. Type BOOTIMG.BIN and replace the suggested name. Your project should now contain BOOTCAT.BIN and BOOTIMG.BIN Add Files: Add all the files and directories in C:\Temp\XPCD to the project. During the copy process, when the selected files are being add to the project, you may get an error message or a warning telling you that a file or directory needs to be renamed. You should accept the suggested name by clicking the Change button. You may have to perform this operation multiple times. Record: When you are ready to record, use the Disc-at-Once option. |
|||
Burning with Other Software
|
|||
