Introduction
There’s probably nothing more frustrating to a computer user than being in a situation where you’ve just spent hours clean-installing your operating system and getting the user interface looking smart, just the way you like it, only to experience a blue screen of death and a reboot. kadaitcha.cx takes a look at a number of ways to solve Windows 7 problems.
Operating system failure can be caused by buggy or corrupt drivers, services and startup items or by malfunctioning hardware. The job ahead of you is to determine what of those four major areas is causing the problem, then you have to narrow the problem down to the faulty item.
Index
- Your Options
- Change Windows Default Behaviour
- System Restore
- Performing a Clean Boot
- Rolling Back Drivers
- Roll Back a Windows Update
- The Hardware Shuffle
Your Options
Unless you have some experience in determining the likely cause of a failure, it is suggested that you read this entire page before selecting an approach. It is also recommended that your first action should be to change Windows 7′s default behaviour for stop errors, which is discussed below; if you prevent Windows 7 from rebooting when a stop error occurs you can use the stop error code to help determine where the fault lies.
If you recently added some hardware, remove it.
If you suspect a hardware problem but haven’t added any hardware recently, remove all the hardware that is not essential to running the computer, such as add-on video and network cards.
If you recently added some software, either uninstall it or, preferably, use System Restore and restore your system to a date and time before the software was installed.
If you applied a Windows Update, roll it back.
If you have updated one or more drivers, roll them back.
Change Windows Default Behaviour
When a stop error occurs the default behaviour for Windows 7 is to do a memory dump to disk and reboot. That would all be well and good if it were true that a reboot fixed a stop error, which it doesn’t; at best a reboot clears the error and perhaps allows the machine to start again but the stop error will likely recur.
It is necessary to prevent Windows 7 from rebooting if you want to troubleshoot the cause of the problem because the stop error isn’t displayed on the screen long enough for you to read it.
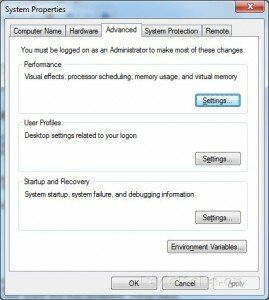
In Control Panel\System and Security\System click Advanced system settings to open the System Properties dialog:
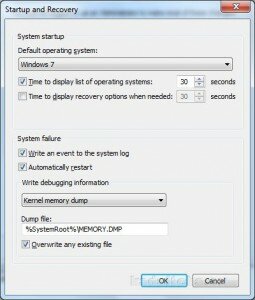
On the Advanced tab there are three group boxes. In the group box titled Startup and Recovery click the Settings… button. The Startup and Recovery dialog appears:
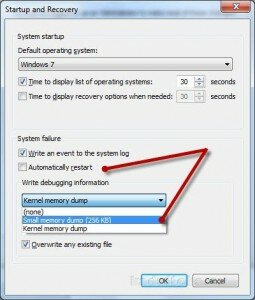
In the System failure group box, uncheck Automatically restart and choose Small memory dump in the Write debugging information group box:
The next time a blue screen of death occurs your operating system will not reboot and the stop error will stay on the screen where you can read it and weep.
System Restore
Windows XP system restore was notorious for being a kludge. It was common practice for advanced users, kadaitcha.cx among them, to turn it off, to advise everyone else to turn it off, and rely solely on backups. XP system restore chewed up a lot of disk space and was unreliable. Things have changed a lot since XP; disk drives now have much higher capacity and system restore in Windows 7 works like a charm. If you are experiencing stop errors then system restore should be your first line of defence against blue screens of death if you’ve recently added new hardware or software.
- Unlike with Windows XP and Windows Vista, kadaitcha.cx highly recommends you keep system restore enabled for Windows 7.
- To use system restore simply type system restore into the search bar on the Start menu and press enter. From there, just follow the bouncing ball.
- System restore will not fix hardware errors so it is important to determine if you have a possible hardware or software error before you use system restore.
Performing a Clean Boot
You can use msconfig (System Configuration tool) to perform a clean boot then selectively enable drivers and programs. You will need to be logged on using an account that has Administrator rights to use msconfig.
msconfig can help you to identify issues that cause blue screens of death or prevent Windows 7 from starting correctly by allowing you to turn off services and startup programs and then turn them back on one at a time or in groups. If a problem seems to be resolved when a particular service or program is prevented from starting then the service or program can be suspected as the cause of the problem.
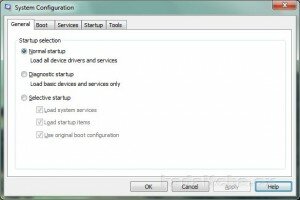
To start the System Configuration tool, type msconfig into the Start menu search box and press enter:
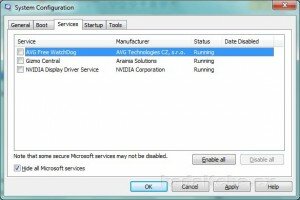
A) On the Services tab, ensure that Hide all Microsoft services is checked. You may leave this item unchecked and disable all services, including Microsoft services, if you are certain that you no longer need your System Restore points. Next click the Disable all button. The image below is provided for guidance. The startup items on your Services tab will reflect what you have installed, not what you see listed here:
B) Click Apply then click OK and reboot your machine.
If the problem does not recur then the offending item is probably one of the services you have disabled. Repeat step A) but this time enable half of the disabled services then repeat step B). Continue enabling and disabling by successive halves until you isolate the problem to a single service.
If the problem recurs then the offending item isn’t a service. Enable all the services then perform the steps labelled C) and D) below.
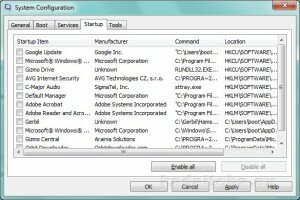
C) On the Startup tab, click the Disable all button. As with the previous image, the items you see here will reflect what you have installed, not what is listed in the image:
D) Click Apply then click OK and reboot your machine.
If the problem does not recur then the offending item is probably one of the startup you have disabled. Repeat step C) but this time enable half of the disabled items then repeat step D). Continue enabling and disabling by successive halves until you isolate the problem to a single startup item.
If the problem recurs then the offending item probably isn’t a startup item. Enable all the startup items then reboot.
Rolling Back Drivers
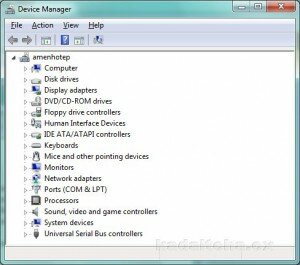
In Control Panel\System and Security\System click Device Manager:
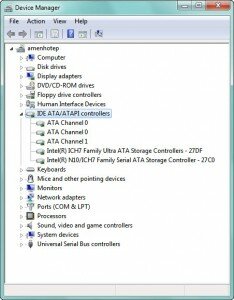
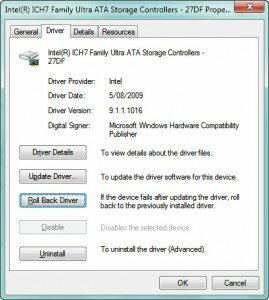
Expand the tree view for the hardware device that had its driver updated. For example, you may have updated a hard disk driver:
Right-click the device and select Properties. On the Driver tab, click the Roll Back Driver button:
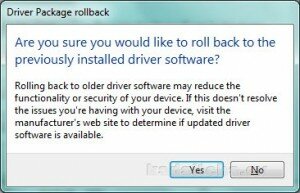
You will be prompted to confirm your choice. If you are certain that you want to roll the driver back to the previous installed version then click Yes:
Roll Back a Windows Update
Windows Update stores its installation files on your hard disk. Provided you haven’t deleted those files, you can uninstall any update.
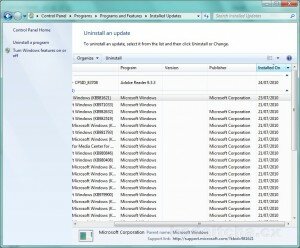
In Control Panel\Programs click Uninstall a program then click View installed updates. A screen similar to the following will appear. Either expand the window or scroll across to locate the column header named Installed On. Click the Installed On column header to sort in descending date order:
Click on the update you want to uninstall and click Uninstall. You will be asked to confirm that you want to go ahead. After the update has been removed, reboot your system.
The Hardware Shuffle
If you suspect a hardware issue and your system isn’t a laptop you can remove the computer’s case cover and:
A) Gently but firmly push all connectors to ensure they are correctly fitted.
CAUTION: You can crack your motherboard and make it completely unserviceable if you push too hard and the board is not secured properly. If in doubt, get someone to help you or take the machine to a professional.
B) If you have a ye olde worlde machine with electronic chips that can be removed from a cradle or socket make sure they are seated correctly. Components of this style can suffer what is called chip creep. As a chip heats and expands it creeps out of its socket and stops functioning.
C) Take out all hardware that isn’t essential to the running of the machine; this includes add-on cards such as video devices, USB hubs, sound cards, secondary hard disks and/or disk controllers and network cards.
If you perform step C) then replace your hardware one piece at a time and boot the machine. Repeat with each piece of hardware until the defective hardware is identified.
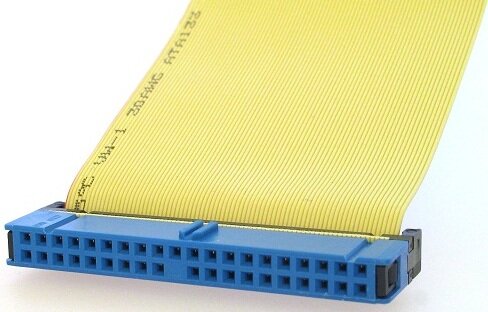
D) ATA ribbon cables are susceptible to damage due to their construction. A set of sharp pins inside a connector pierce a plastic sheath to make a connection to copper wire. It is a good idea to not only push the connectors firmly into their socket but also to bend the ribbon cable where it joins the connector:
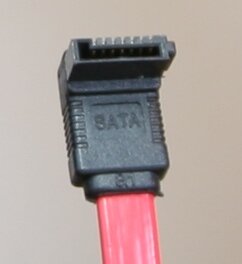
E) SATA connectors are very small, prone to have a weak grip and experience cracking or breaking. Ensure that SATA data and power cables are firmly in place:
